Here is a detailed walk-thru for anyone that would like to do a simple cure to get started. I would argue that you can maybe even make this and cure it in your normal fridge! If not, let me know 🙂 but I would assume you have a curing chamber or cold/humid place to keep this guy while it dries for about one month.
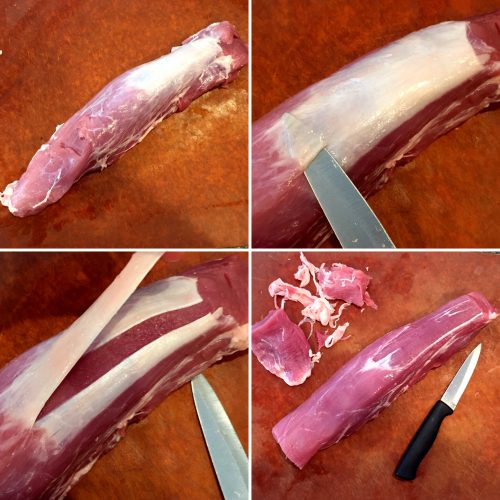
Curing a pork tenderloin is my favorite thing to do. I feel it’s so rewarding in taste per amount of effort put into it, it’s easy to prepare and quick to dry and you can find tenderloins on basically any supermarket shelf. There is just a little trimming and clean up you would need to do with the tenderloin before you begin curing it. This cleanup involves carefully removing as much of the silverskin as possible and cutting a little off both ends until you end up with something resembling more like an even cylinder. Once you have completed this step, you are ready to begin curing.
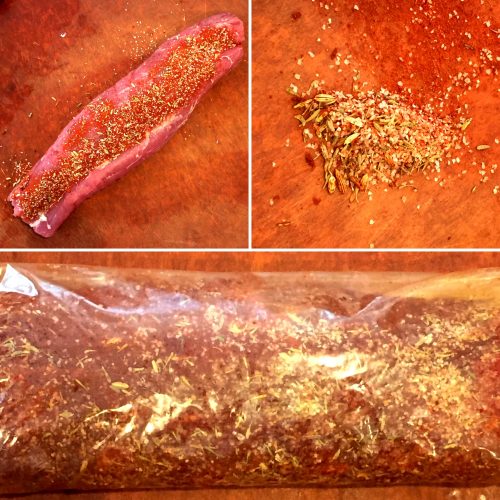
You can find a tenderloin virtually in any supermarket shelf, so this is a good choice to start. To clean up, remove as much of the silver skin as possible and any loose hanging tissue and trim both ends to have a clean cylindrical piece of tenderloin.
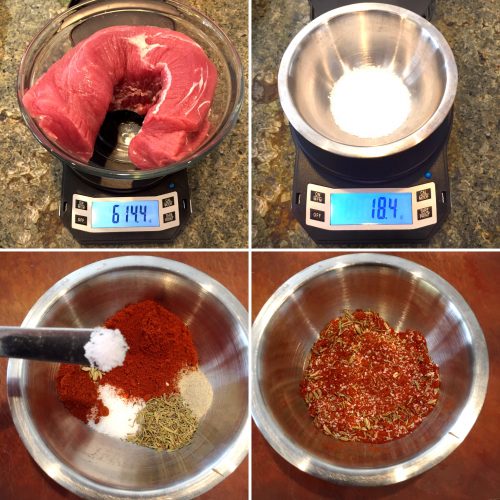
Next you need to weigh your tenderloin to get a total meat weight that you will use to calculate the amount of salt required in grams.
3% table salt is what we are looking for an “equilibrium” cure. I personally would prefer less, but its recommended to use 3%. For example, in this case the tenderloin weight 614 g, you would multiply this by 3% (0.03) to get 18 grams of salt.
If you have curing salt #2, you can apply a little pinch here as shown on the photo.
The rest of the flavoring spices is completely up to you and your personal taste. I like Spanish Pimenton de la Vera, so I’m using that here with some fennel seeds and black pepper. The amounts are not so crucial. Add to taste and mix all with the salt.
Next, cover the tenderloin with all the spices and salt and rub it well before placing inside a ziploc bag. Make sure to pick up and add to the bag any leftover salt on the cutting board, otherwise the salt percentage you calculated before will be off.
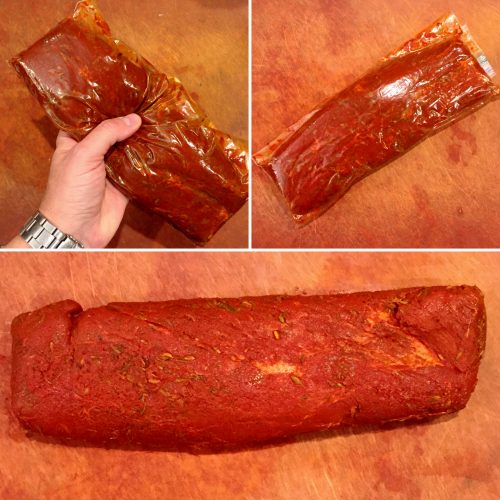
Place the ziploc bag in the fridge and massage and flip over every other day or so over the next 7 days. The salt would have been adsorbed by the meat over this period of time and it is now ready for the next step.
Rinse the spices off the tenderloin under the faucet and pat dry with a paper towel.
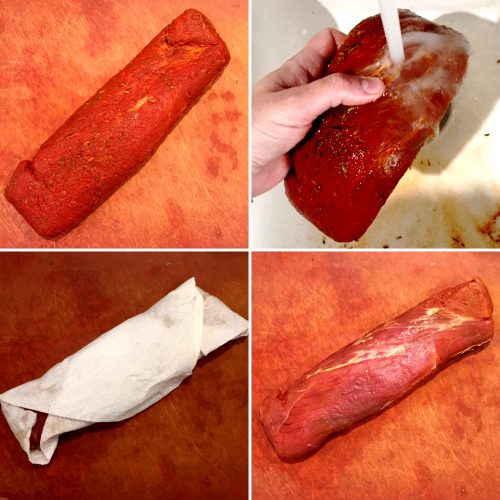
The next steps may get a little confusing, but the idea is to compress the tenderloin to make it shorter and fatter. I do this to get more of the tender goodness when its done drying.
Next, we are going to tie up the tenderloin in this squished position and create a structure to hang it from. Get enough butcher twine to go around the muscle twice. Follow the image below, which at the end shows the strings you will use to hang your meat on a hook.
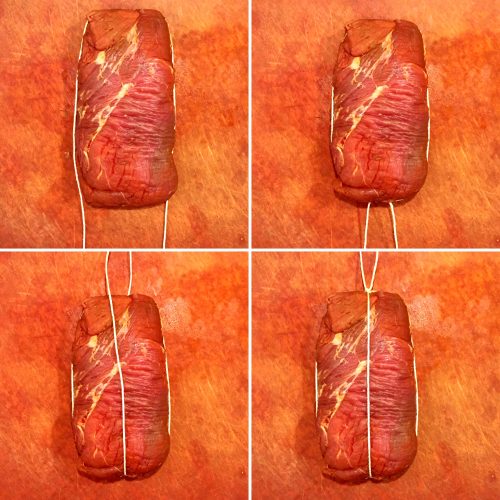
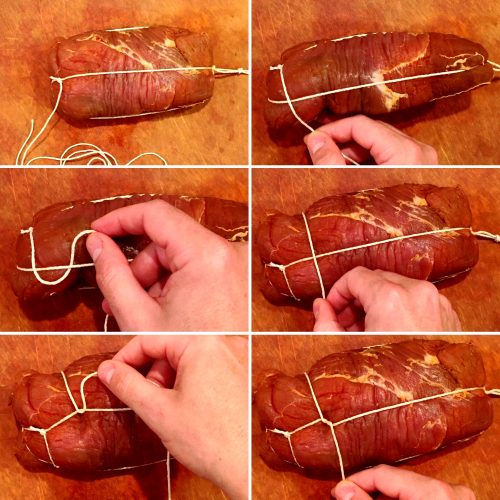
If you were to hang it like its shown in the photo above, the tenderloin would just fall thru the spaces in the strings. to avoid that we need to go around in a spiral from the bottom to the top, creating something like a ‘basket’ to hold your meat.
Get a long piece of string and tie one end to the bottom part of any of the first set of strings. Move to the next string, go over and then under it and pull back. Then keep repeating this moving up in a spiral until you reach the other end.
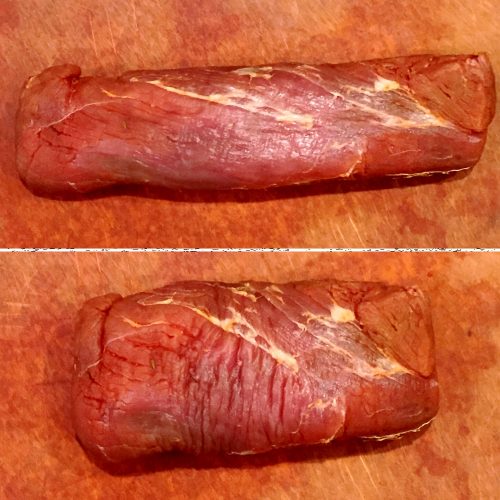
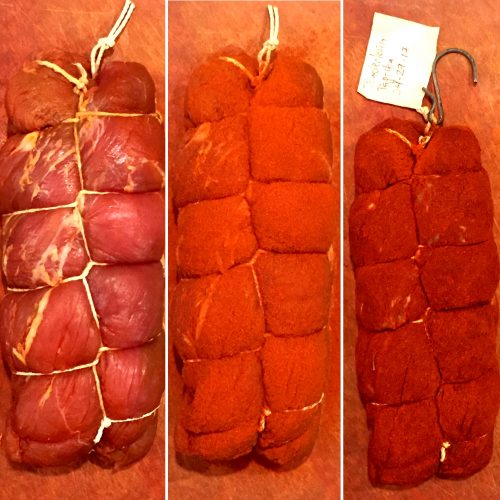
At the end your tenderloin will look like the picture on the left. At this point you can cover the meat again with a healthy amount of spices similar to what you used initially. In this case for me, that was Pimiento (paprika), so i added a lot more to cover the muscle. Then massage some more and add your label and hook.
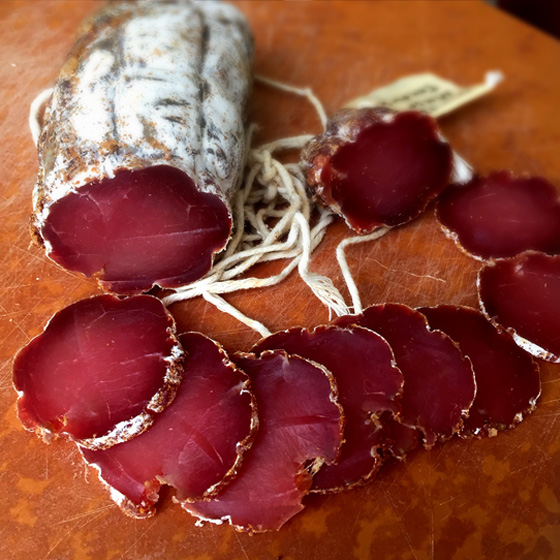
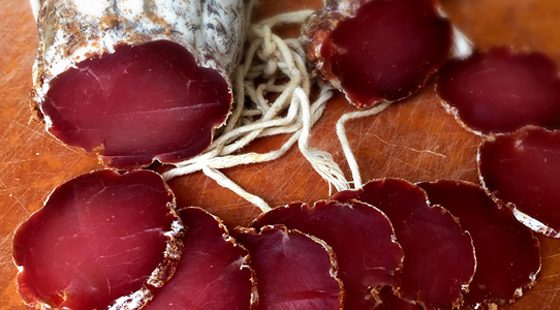
Write down the final hanging weight, in this example 621 grams. Add this weight to your label and write what your target weight should be. I prefer to dry up to when the meat looses 40% of its weight. In this example, that will be when it weighs around 372 grams. Normally, this will take about 1 month with a relative humidity at around 60%-80% and a temperature between 40 – 60F (4C – 15C).
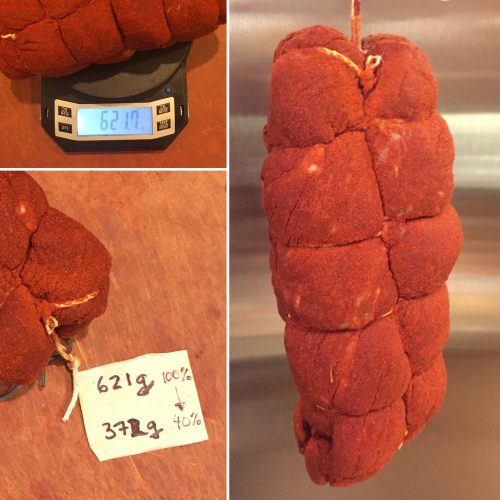
The final photo here shows some white mold growing on the surface, that happens because my chamber has lots of ‘good’ mold spores around. If you are starting, you likely will not have that. You may get some ‘bad’ mold growing. Don’t worry, your meat is not ‘going bad’ because you got some mold outside. If you see some green mold on it, just wipe off the mold with a wet paper towel with a vinegar/water solution and set it back to keep drying. If you have any doubts, send me a picture via Instagram.
Let me know if you have any questions!